How to Use a Zebra YMCKOO Ribbon on a ZXP Series 3
Zebra YMCKOO ribbons allow you to add a watermark-like image to your ID cards. This makes your cards easier to authenticate and harder to tamper with or illegally duplicate
Using a Zebra YMCKOO Ribbon
To begin, you will need to create a custom monochrome bitmapped image to import into the printer driver.
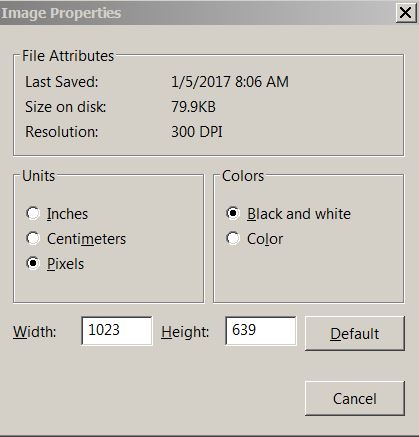
- Open Windows Paint Program by clicking your Windows start button, then accessories, and then Paint. Set the image dimensions of the document to 1023 by 639 pixels in black and white.
- Create your design using black only.

- Choose Other formats when saving.
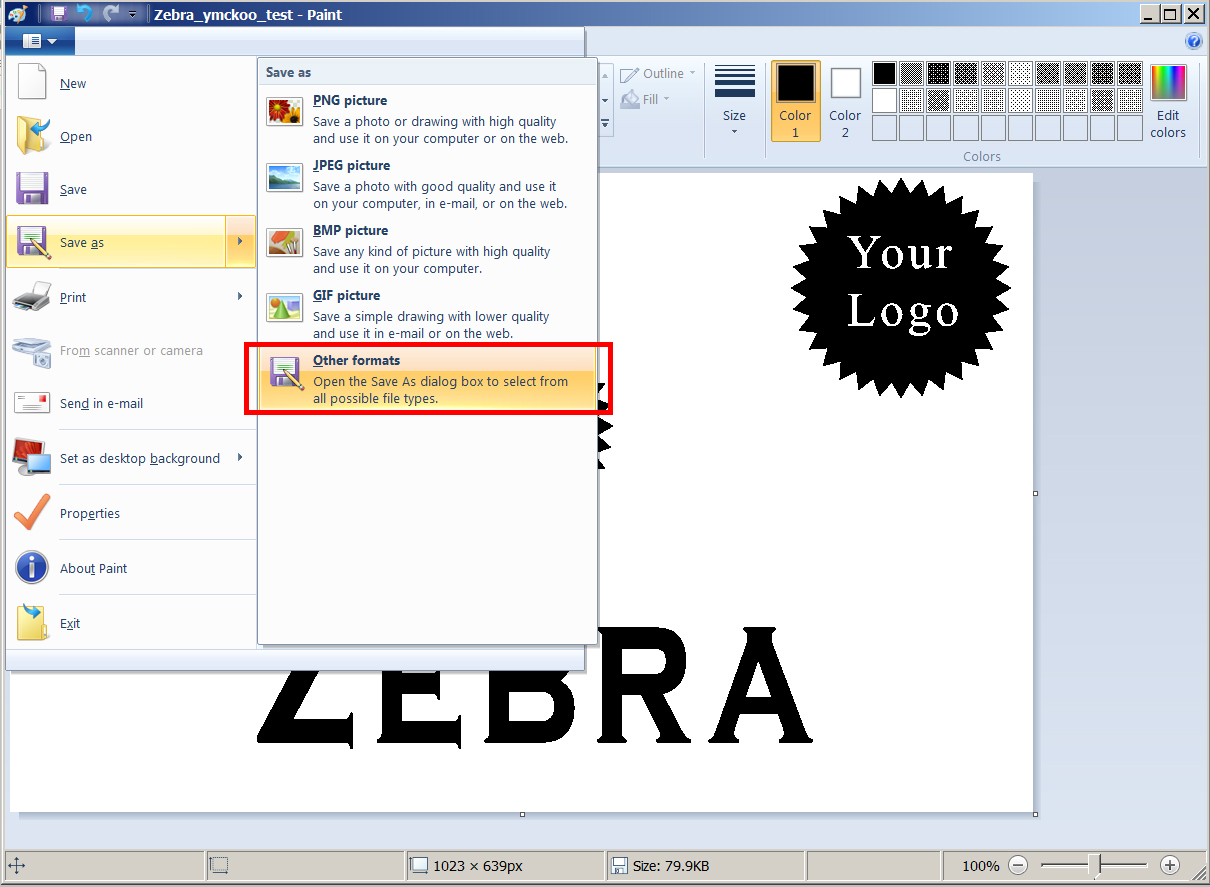
- Save the image as a monochrome bitmap.

Once you have the image, you can import the image into the Zebra ZXP 3 Driver.
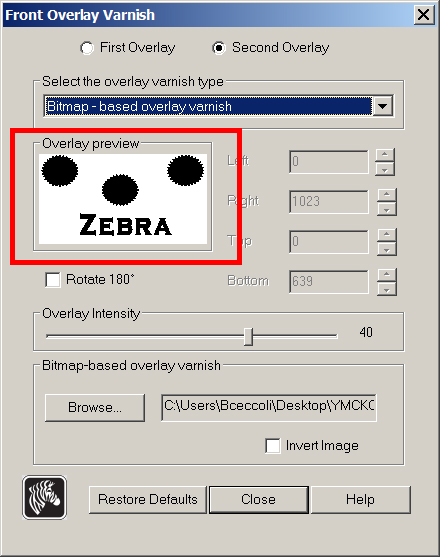
- Go to your devices and printers, right click on the ZXP3 printer and choose printing preferences. Click on Front Overlay Varnish.
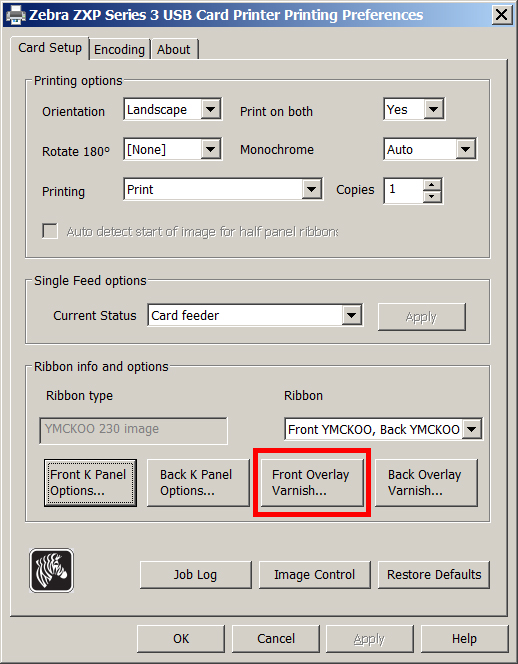
- Click on Second Overlay and then Choose Bitmap-based overlay varnish.

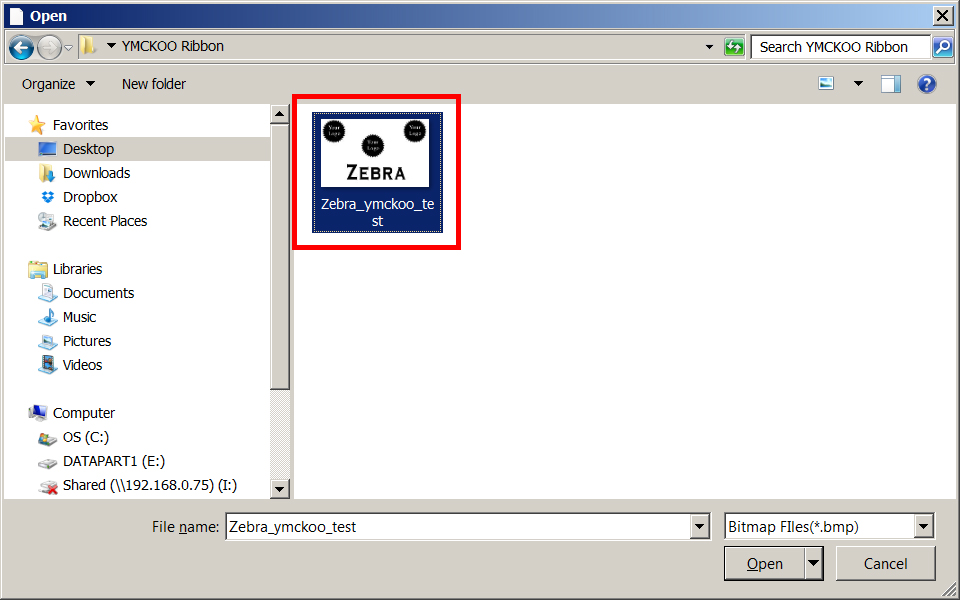
- A browser window will pop up. Browse to the monochrome bitmapped image you created to open it.
- The driver will now preview the image. If it is correct, click Close.
The printer will now print your image in the second overlay and have a frosted watermark look in the areas that are defined in black.
If you continue to experience problems, please contact AlphaCard technical support.