How to Test the Magnetic Stripe Encoder on Tattoo2
Encoding is a useful way to store data on your ID card, because an encoded card can hold more information than could be printed on the card. It also makes it quick and easy to access additional information, such as cardholder information you don’t want printed for security reasons or to pull up a membership account.
The Evolis Tattoo2 line of printers have several encoding options. This page will walk you through the steps for magnetic stripe encoding. These cards are used in a wide range of applications, from gift cards to library cards, time and attendance systems, and more.
Please Note: The Evolis Tattoo 2 has been discontinued by the manufacturer. If you need a new printer, the AlphaCard System Selector can help you find the best printer for your needs.
Run a Test Print
You should always run a test print to make sure your encoder is working properly, especially if you are new to this process.
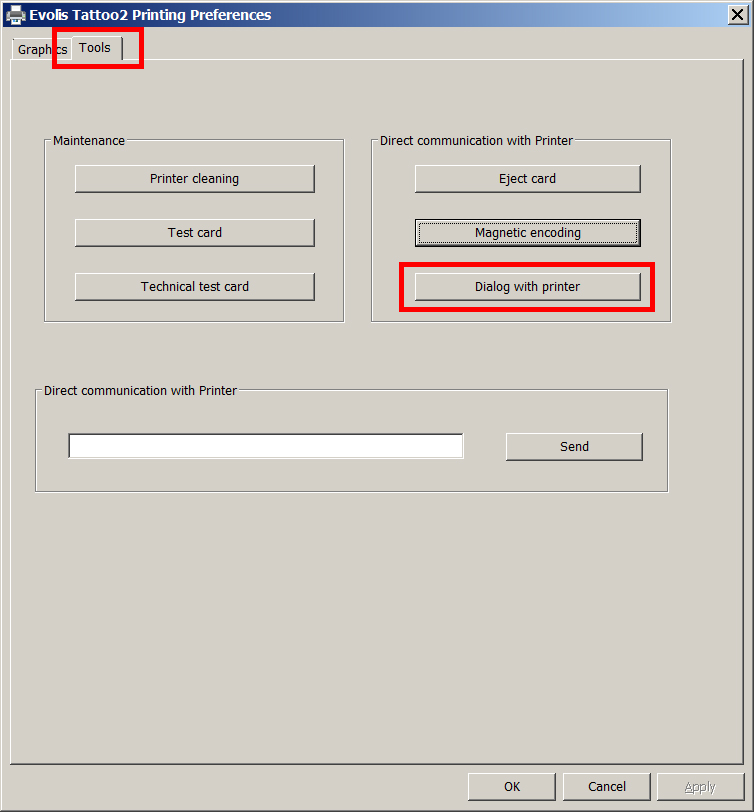
- Go to your Devices and Printers folder on your computer. Right click on the Evolis Tattoo2, and choose Printing Preferences.
- Click on the Tool tab, and click on the Dialog with Printer button.
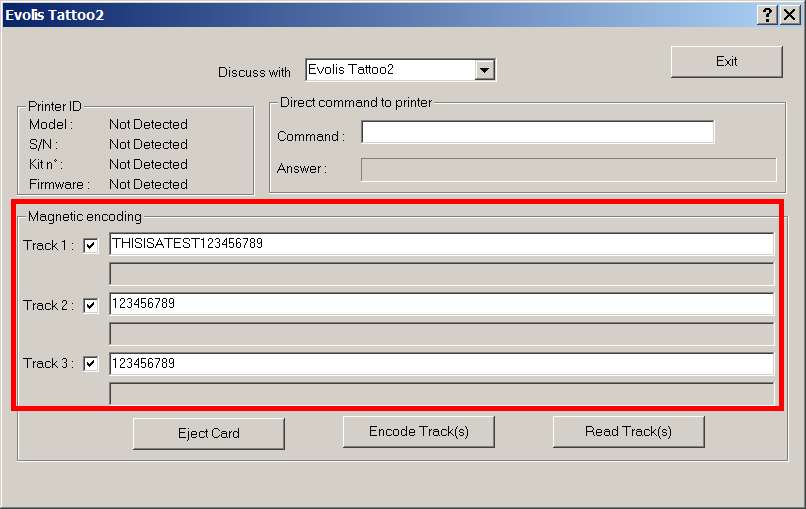
- Enter some sample data in tracks 1, 2, and 3, then click Encode Track(s).
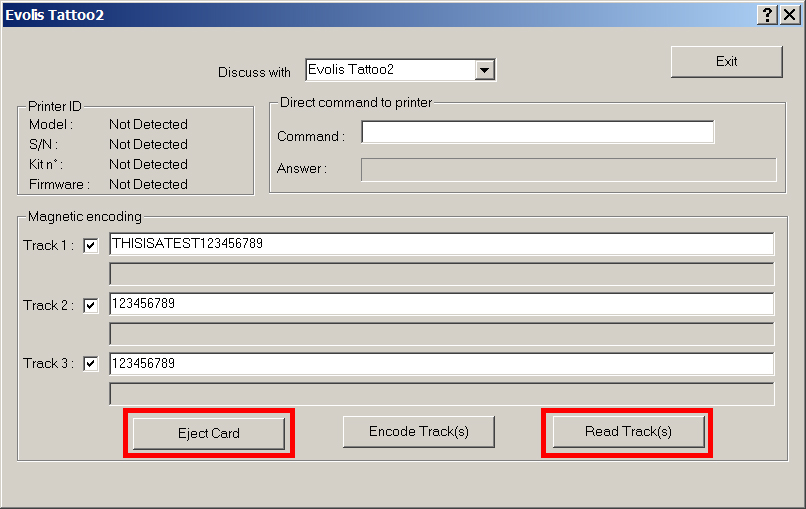
- Click Read Track(s), and the data from the card should populate the fields. When you’re done, click Eject Card.
If you continue to experience problems, please contact AlphaCard technical support.