Using the Scaled Image Feature on the Pronto
If you are printing a card on your Magicard Pronto with a bleed area on the right-hand side of the card, but your image is too short it is creating a white bleed area, you can follow these steps to use the Scaled Image Feature to adjust the position of your image.
Magicard Support Utility
To begin, you will need the Magicard Support Utility icon on your computer’s desktop. If you do not have this, you will need to download and install the Magicard Support Utility. To do so:
- Go to the Magicard Support Utility page.
- Click the Magicard Support Utility link and save the file to your PC. DO NOT run this file from the Internet.
- To install the Utility, navigate to the location where the file was saved and double-click on the icon to start the installation.
- Select Run and use the defaults to install the Utility.
Using the Scaled Image Feature
To activate the Scaled Image Feature:
- Send the command MOD,SCION in the Quick Command Box (the comma is needed between MOD and SCION).

- The current status will be shown in the query information – you should see Image Scaling: OFF. The default is OFF.
- To deactivate this, send the command MOD,SCIOFF in the Quick Command box (the comma is needed between MOD and SCIOFF).
Typically, you will use this method when you have a bleed area on the right-hand side of the card but your image is too short and creates a White bleed area.
You can activate DEALERSERVICEON to adjust this end position, up to the maximum of 50. If you still have a white bleed area on the right-hand side of the card, you will need to go above 50.
Please Note: You should only use the built-in full-bleed test card for adjustments to the end position. To print one, send TST8 in the Quick Command Box.
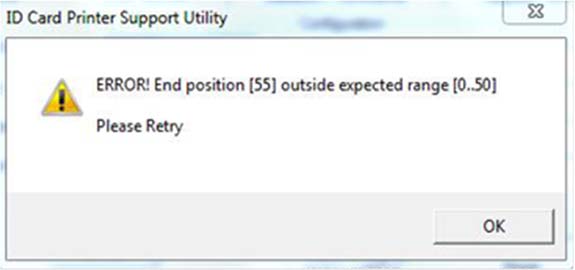
One issue you may run into is the support utility not allowing you to go above 50. You will get this error:
To work around this error, send MOD,FEP55 in the Quick Command Box (Statistics/Commands tab). Or you can send the MOD,FEP55 command from the Tools tab in the driver’s Printer Properties.
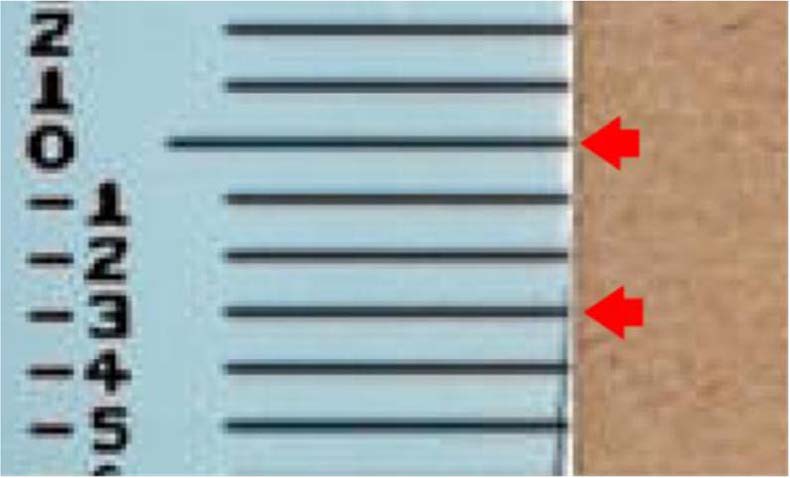
You will need to adjust the end position until the line leaves the end of the card on zero. The example here shows the end position (currently 58) that needs to be reduced from 58 to 55 (-3) to be perfect.
If you are still having problems, please contact AlphaCard technical support.

