How to Adjust the Print Head Power on a PRO 500
If your AlphaCard PRO 500 printer is having problems printing properly, such as breaking ribbons or printing images too dark or light, you may need to adjust the print head power.
- How to Adjust Print Head Power on a PC
-
- Go to your computer’s Devices and Printers folder.
- Right-click on the PRO 500 printer.
- Choose Printing Preferences from the menu that pops up.
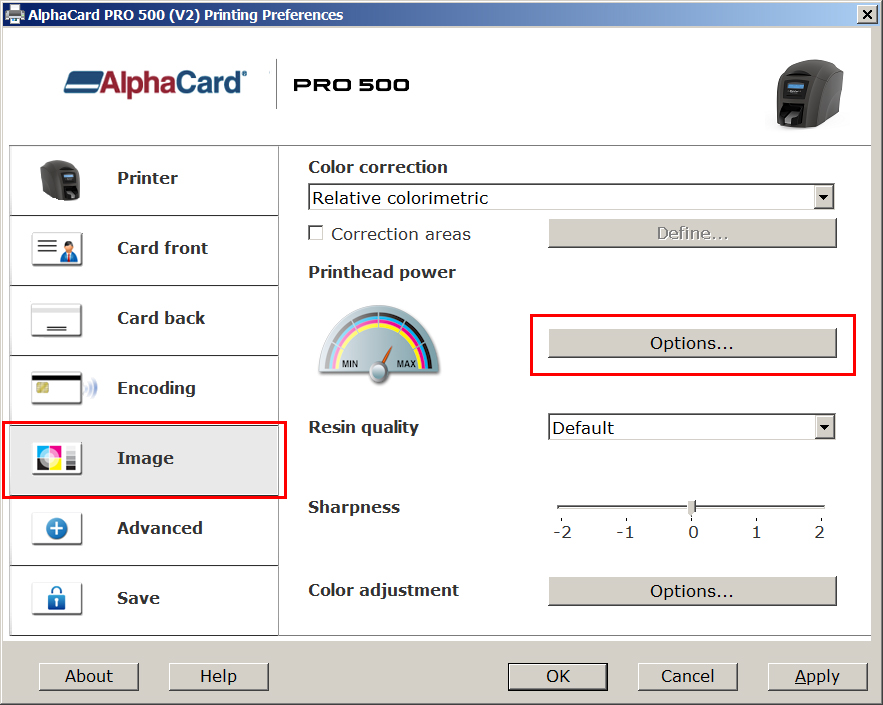
- Click on the Image tab, and then click on the Options button.

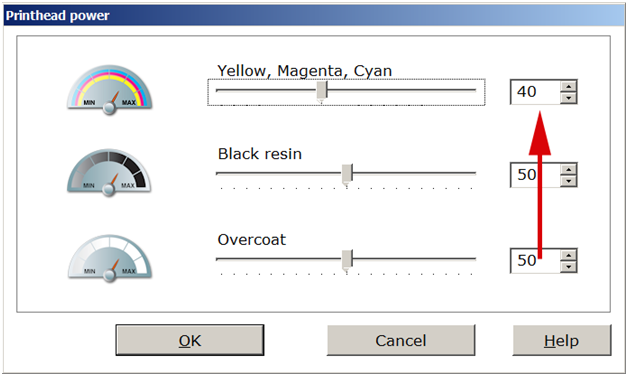
- Reduce or increase the value on the Yellow, Magenta, Cyan bar as needed.

- Click Ok to save these changes.
- How to Adjust Print Head Power on a Mac
-
To access the printer driver settings on a Mac computer, you need to go through the software you are printing cards with – in this example we will use AlphaCard ID Builder.
- Open your card software, then open a card design.
- Go to the File tab and choose Print Settings.
- Choose the printer you want to adjust from the dropdown menu. Click the Advanced Options button on the right.

- Once you’re in the Advanced Options menu, a Printer Settings window should appear. By default it might be very minimal; click Show More Details to see more. Change the middle dropdown menu to Printer Features.

- This will show all the printer features you can adjust. To get to the color correction and printhead adjustment options, set the Features Set dropdowm to Advanced 1.
- Adjust the Colour Correction, Printhead Power (YMC), and Printhead Power (Black Resin) as needed.

- Click OK to save your changes.
If you continue to experience problems, please contact AlphaCard technical support.

