How to Use Barcode Automatic Check In with Standard
When setting up a visitor check in station, one of the most used technologies in the visitor management industry are barcodes. AlphaCard Visitor Pass allows you to scan barcodes to automatically check visitors in or out.
How to Use Automatic Barcode Check-in
If you have not done so already, please refer to setting up barcode automatic check in to make sure that the barcode set up process is completed.
AlphaCard Visitor Pass allows multiple options to set up automatic barcode values. These are:
- Scan an existing barcode
- Generate a random value
- Assign a database column
Scan an existing barcode allows you to keep existing ID badges and sync multiple systems, such as Timeclock or HR software, with AlphaCard Visitor Pass.
- To Use Existing Barcodes
-
- To sync a badge, select the visitor in the system.

- Then go to the Home tab in the software.

- Then select the option to Assign Barcode.

- Once the box pops up, simply scan the pre-existing barcode. Once you do, AlphaCard Visitor Pass will store that data into the barcode field in the database.

- To sync a badge, select the visitor in the system.
Generate a random value allows you to generate barcode values, if you don’t care what each visitor is assigned.
- To Generate Random Barcodes
-
- To generate a random barcode, select the visitor in the system.
- Then go to the Home tab in the software.
- Then select the option to Assign Barcode.
- Once the box pops up, click the blue Generate button.

- AlphaCard Visitor Pass will let you know that the barcode has been generated successfully. The new barcode value will also appear in the barcode field in the database.
- To generate a random barcode, select the visitor in the system.
Assign a database column allows you to set any user configurable text column as the barcode value.
- To Assign Barcodes
-
- To set the database column, select the visitor in the system.
- Then go to the Home tab in the software.
- Then select the option to Assign Barcode.
- Under the use column section, select the field you want to use from the drop down menu, and then click OK.

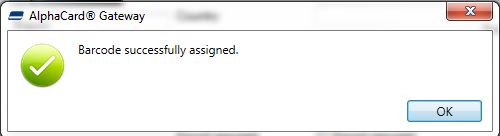
- AlphaCard Visitor Pass will let you know that the barcode has been assigned successfully.

- To set the database column, select the visitor in the system.
Once you have assigned the visitor a barcode, you are ready to use the automatic barcode check in function. Simply leave Visitor Pass on the main screen. Scan the barcode. Visitor Pass will pull up the visitors account information, and then check them in or out, depending on their current status. If any further action is required, Visitor Pass will display the relevant screens before proceeding.
If you continue to experience problems, or have questions about your AlphaCard Visitor Pass software, please contact AlphaCard technical support.